概要
本記事では、Open-RMF (Open Robotics Middleware Framework)のセットアップ方法を記載します。
Open-RMFは、複数の移動ロボットを扱うことができるオープンソースのソフトウェアフレームワークです。異なる種類のロボットを管理することができます。コア部分はROS 2で動作しますが、ROSに対応していない移動ロボットも接続することができるようになっています。
フリート制御を行うことができるフレームワークで、タスク管理、トラフィック制御など行うことが可能になっています。
ROSに対応しているROS 1 Navigation Stackや、ROS 2のNav2に対応している移動ロボットであれば、FreeFleetというパッケージを使用することで比較的簡単にRMFと移動ロボットとを紐づけることができるようになっています。
環境
- Ubuntu 22.04 LTS
- ROS 2 Humble
セットアップ手順
以下の手順を参考にセットアップを進めました。
Open-RMF パッケージの非 ROS 依存関係をすべてインストールします。
sudo apt update && sudo apt install \
  python3-pip \
  curl \
  python3-colcon-mixin \
  ros-dev-tools \
  -y

sudo sh -c 'echo "deb http://packages.osrfoundation.org/gazebo/ubuntu-stable `lsb_release -cs` main" > /etc/apt/sources.list.d/gazebo-stable.list'
wget https://packages.osrfoundation.org/gazebo.key -O - | sudo apt-key add -

# These pip packages are only used by rmf_demos which are not released as binaries
python3 -m pip install flask-socketio fastapi uvicorn
rosdep初期化していない人はrosdep initを実施します。その後、rosdep updateを実施します。
sudo rosdep init # run if first time using rosdep.
rosdep update
colcon mixinを更新します。
colcon mixin add default https://raw.githubusercontent.com/colcon/colcon-mixin-repository/master/index.yaml
colcon mixin update default
RMFをセットアップする場合、「バイナリでインストール]と[ソースからインストール]する方法の2種類あります。今回は、[ソースからインストール]する方法でインストールしていきます。
古いRMFが入っている場合は削除します。
sudo apt purge ros-<distro>-rmf* && sudo apt autoremove
必要なソースコードをダウンロードします。
mkdir -p ~/rmf_ws/src
cd ~/rmf_ws
wget https://raw.githubusercontent.com/open-rmf/rmf/humble/rmf.repos
vcs import src < rmf.repos
rosdepで依存関係のパッケージをインストールします。
cd ~/rmf_ws
rosdep install --from-paths src --ignore-src --rosdistro humble -y
clang, lldbのインストールを行います。
sudo apt update
sudo apt install clang clang-tools lldb lld libstdc++-12-dev
ビルドを実行します。1時間程度かかります。
cd ~/rmf_ws
source /opt/ros/humble/setup.bash # replace humble with ROS 2 distro of choice.

export CXX=clang++
export CC=clang
colcon build --mixin release lld
ここまでで、RMFのセットアップは完了です。
動作確認
rmf_demosを使用して、デモを実行してみます。
空港やホテル病院など様々なデモが存在します。ここではオフィスのデモを実行してみます。
以下のコマンドでRMFを起動します。
source ~/rmf_ws/install/setup.bash
ros2 launch rmf_demos_gz_classic office.launch.xml server_uri:="ws://localhost:7878"
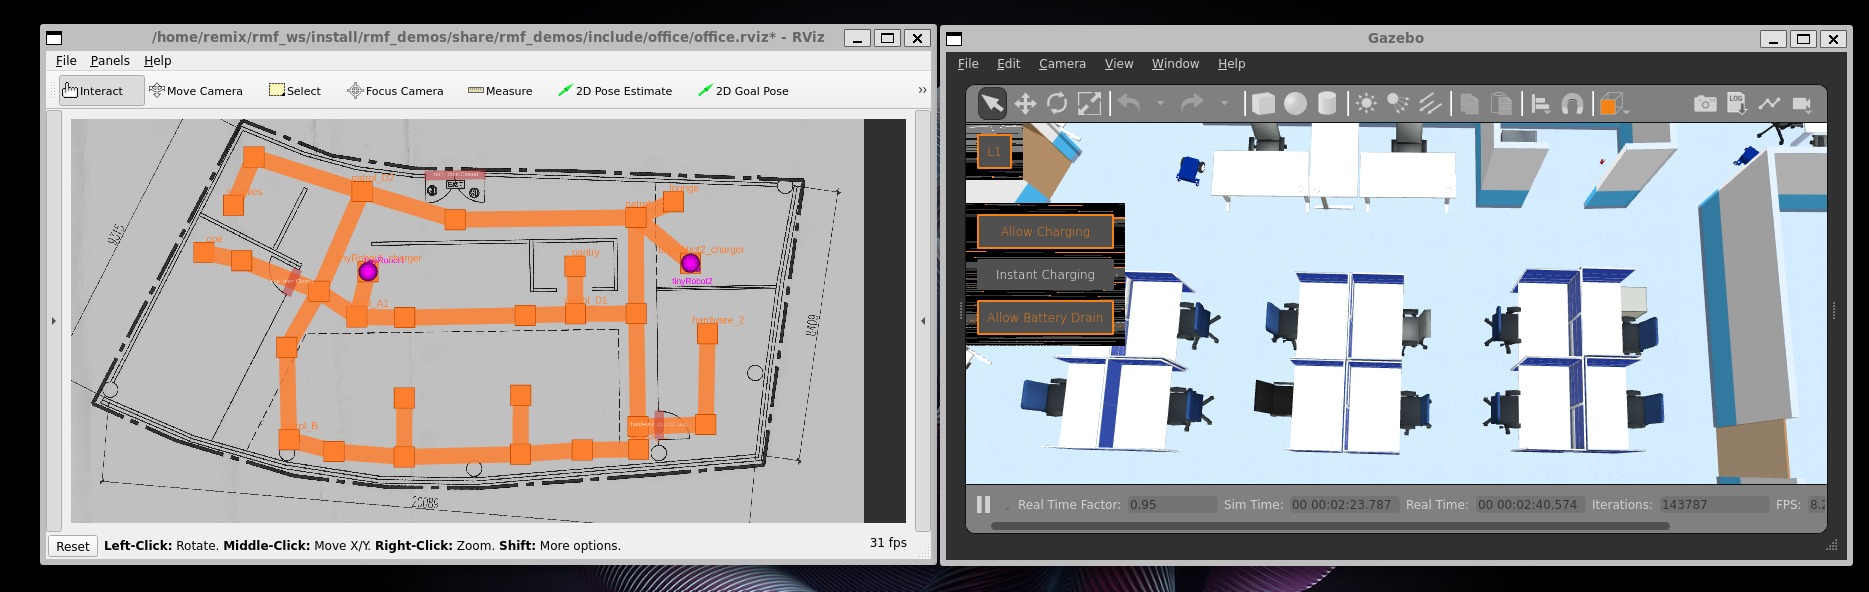
以下のようにGazeboとRViz2が起動します。
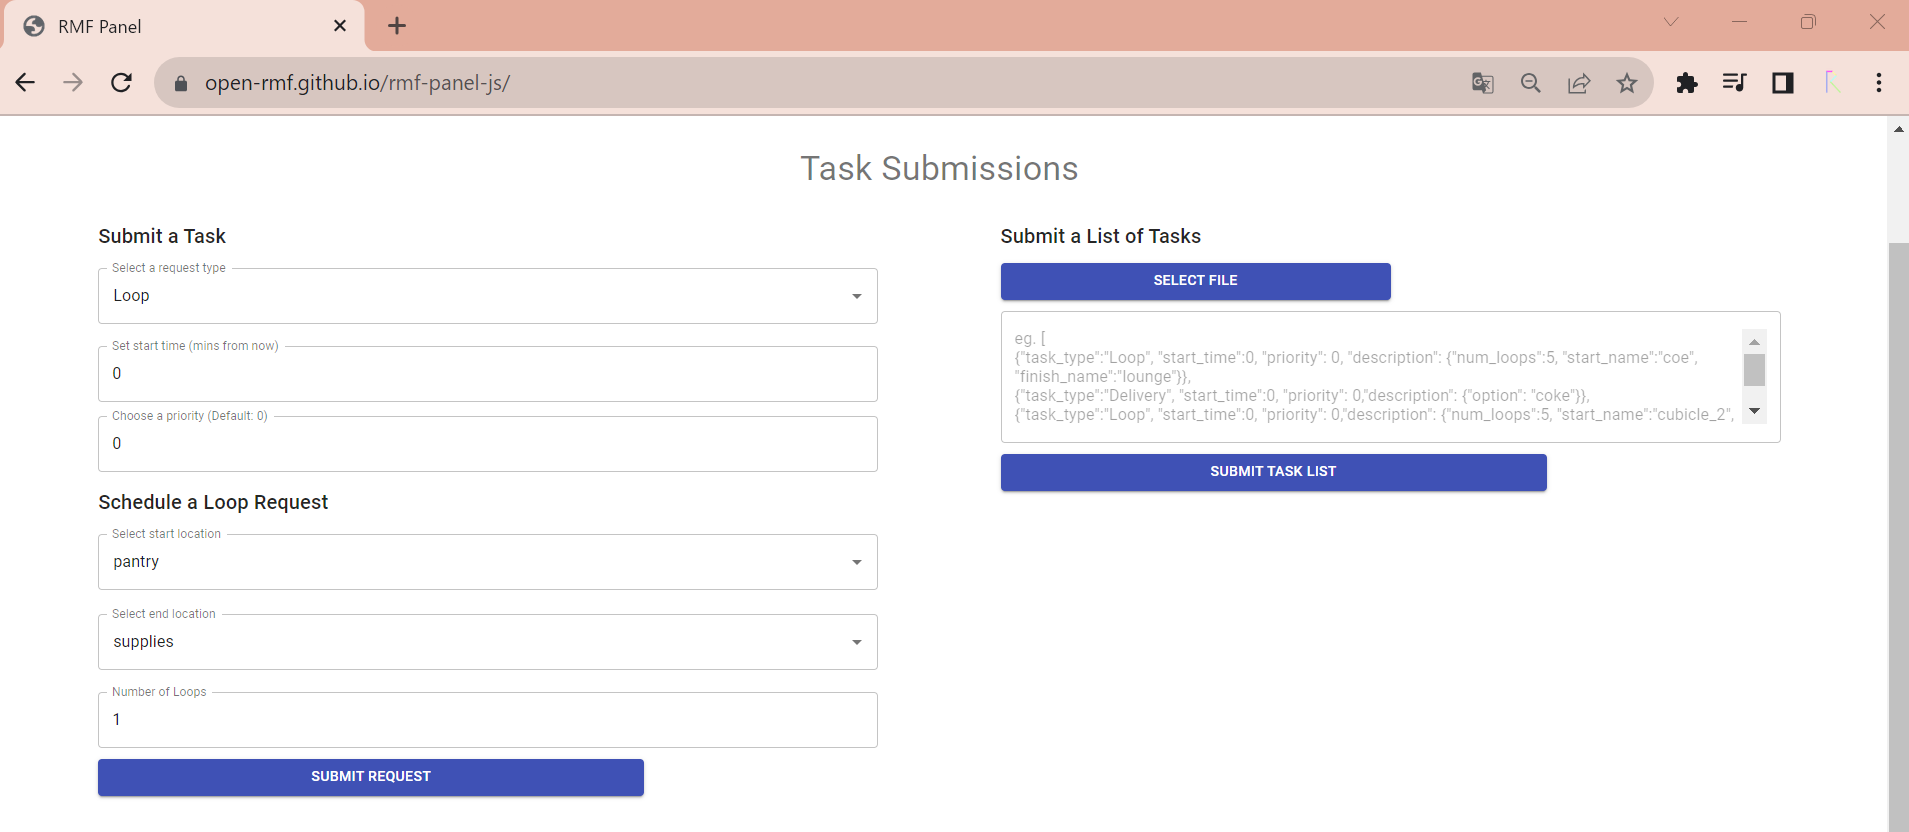
タスクを投入するには、以下のURLからRMF-Panelを表示します。

以下のように表示されるため、Loopを指定して、start location, end locationを指定して、SUBMIT REQUESTを押下するとタスクが投入されてロボットが動くはずです。
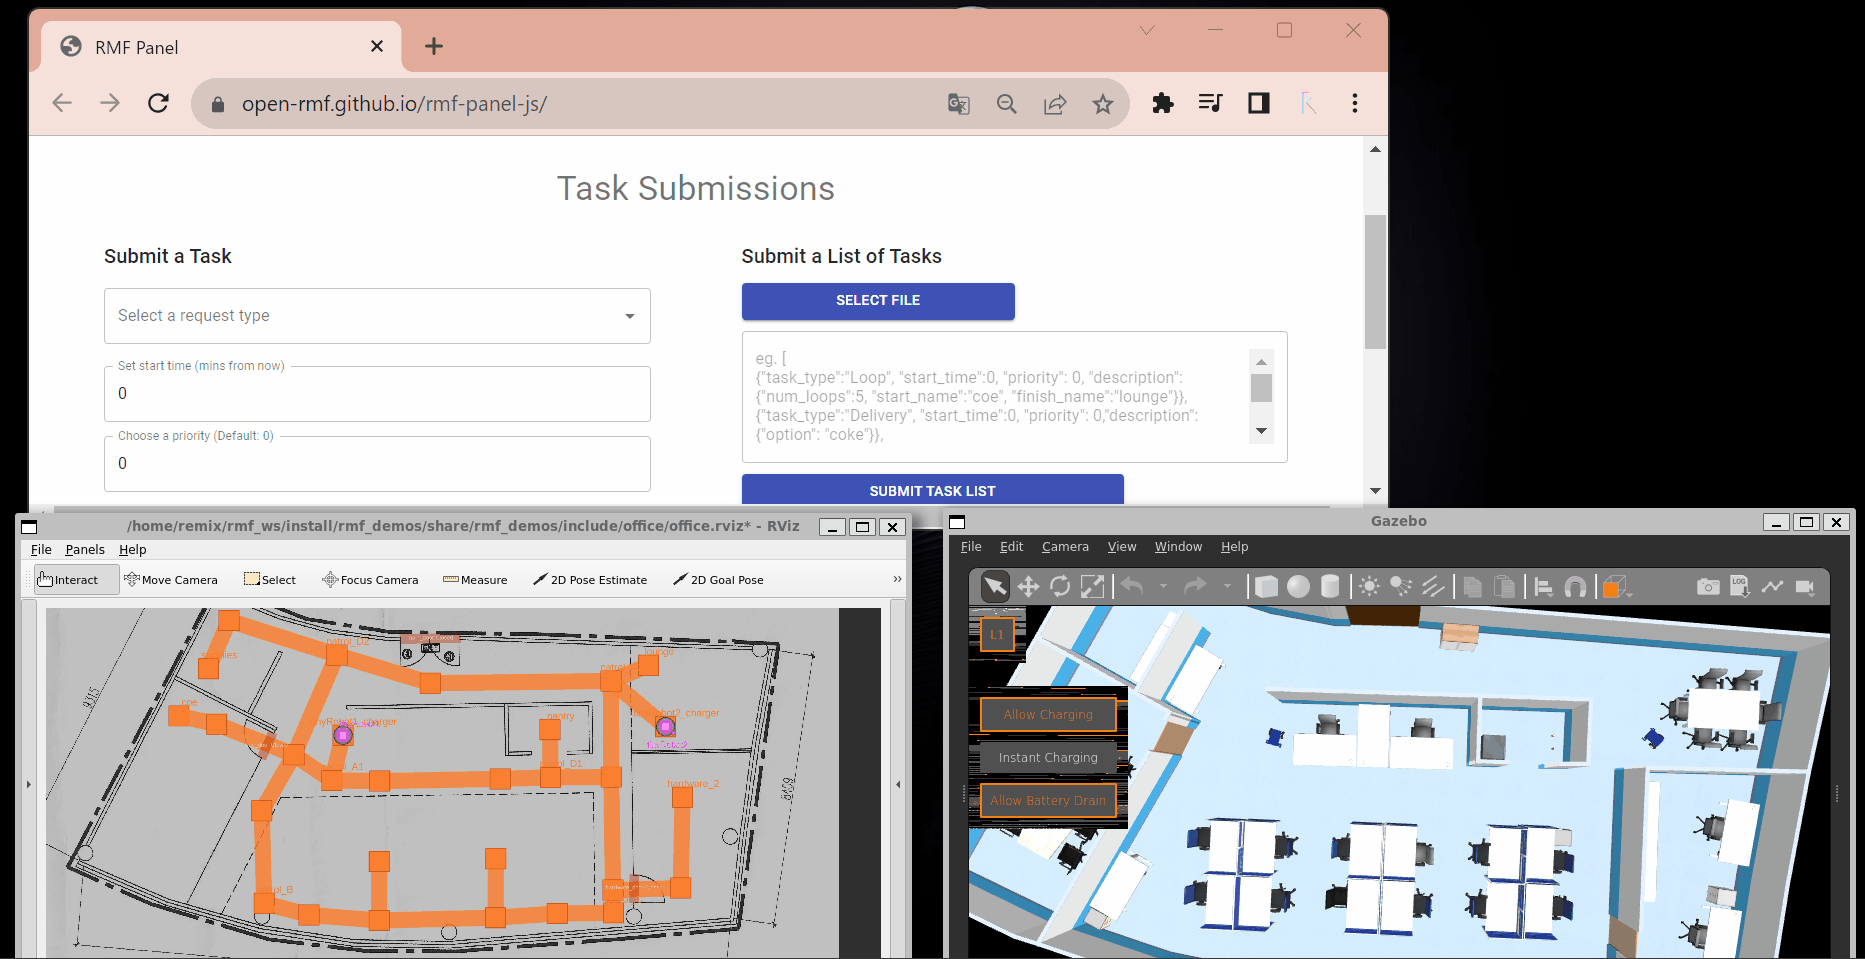
以下のようにRMF-Panelからタスク投入して動作を行うことができます。

コメント