概要
Nav2のCollision Monitor使用して、障害物が近くにある場合に減速したり、停止することができるようになります。
以下のようにSlowdownBoxとStopBoxのポリゴンを指定して、その中にLaserScan等の点群が入った場合に減速や停止を行うことができます。
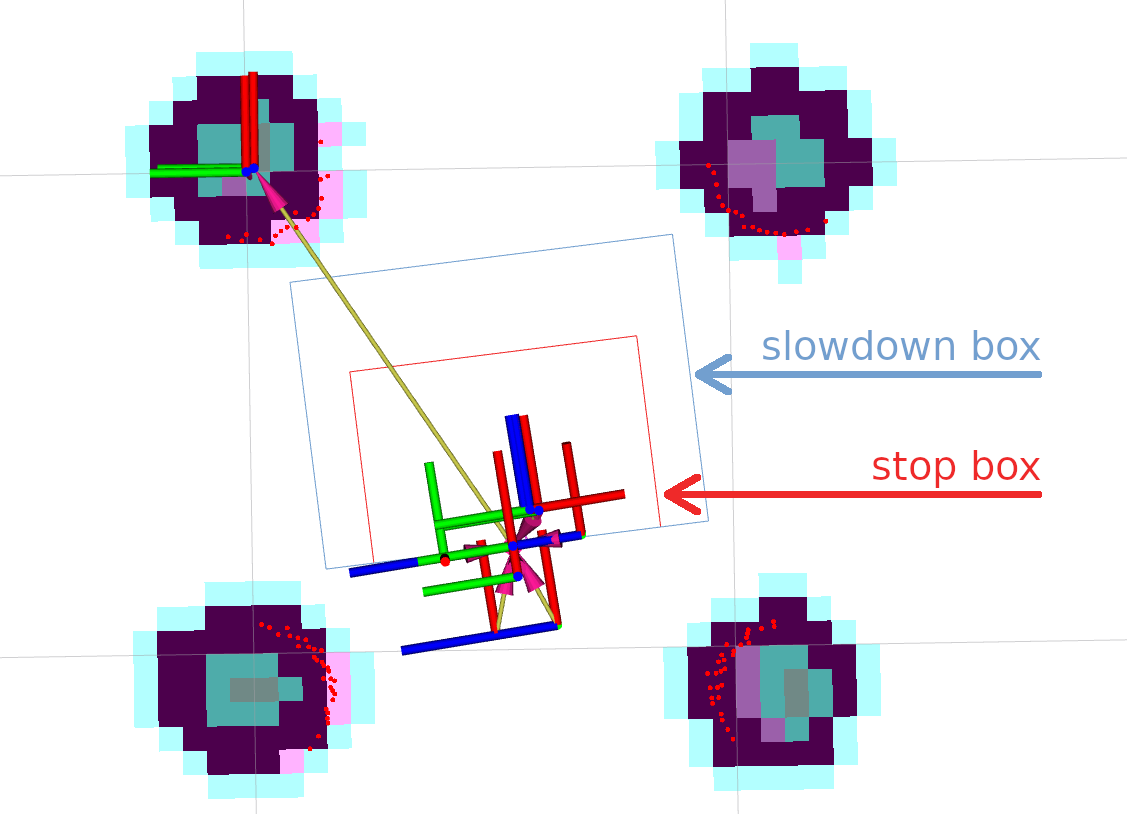
引用:https://navigation.ros.org/tutorials/docs/using_collision_monitor.html#collision-monitor-tutorial
指定可能なセンサーは、以下になります。
- Laser scanners (
sensor_msgs::msg::LaserScanmessages) - PointClouds (
sensor_msgs::msg::PointCloud2messages) - IR/Sonars (
sensor_msgs::msg::Rangemessages)
参考


環境
以下の環境を前提とします。
Turtlebot3のシミュレーションについては
- ROS 2 Humble
- Turtlebot3 Burgerのシミュレーションを使用
Turtlebot3のシミュレーションについては以下を参考に環境構築をします。

使用方法
以下のチュートリアルを参考にして、動作環境を作成していきます。
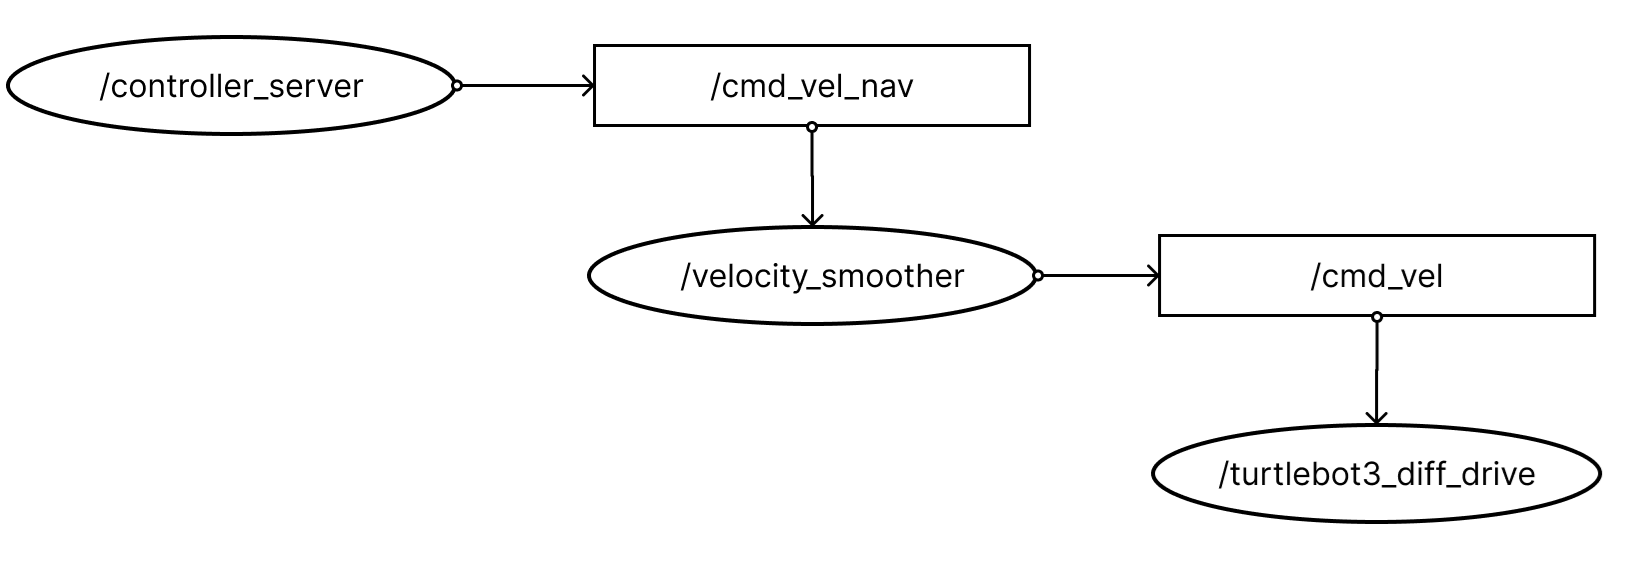
デフォルトのnavigation_launch.pyを使用している場合、velocity_smootherが/cmd_velトピックを発行して、それをturtlebot3_diff_driveが読み込む形になっています。以下のような形です。
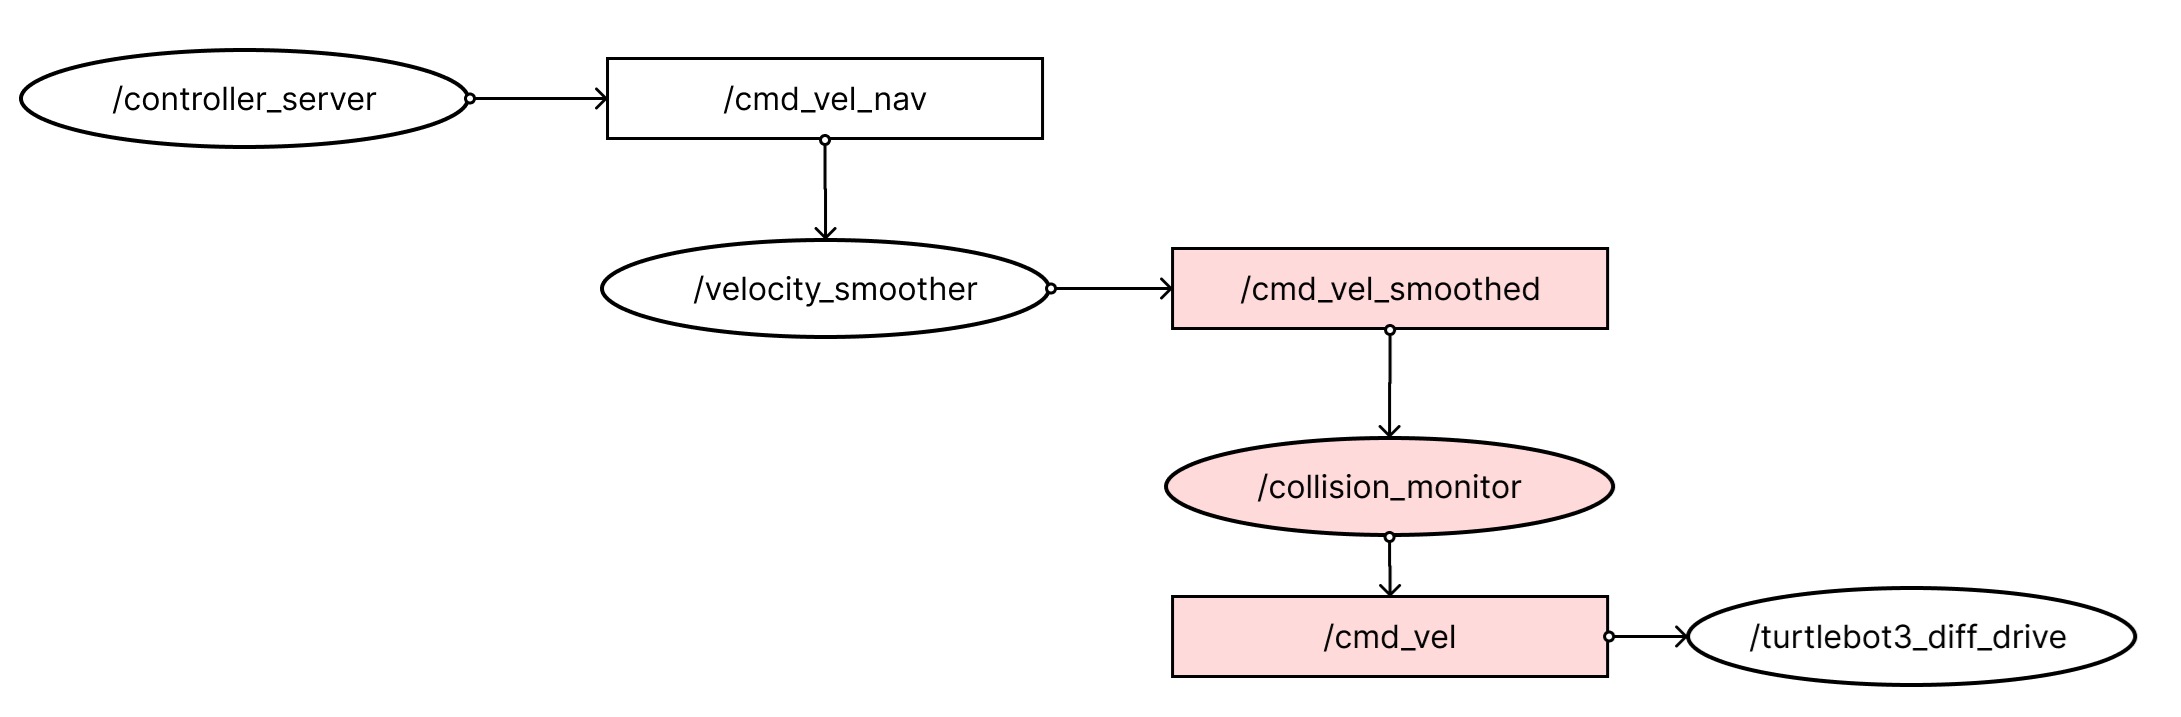
/cmd_velトピックがturtlebot3にわたる部分になるので、この間にcollision_monitorを入れて起動するようにしたいです。(最後の減速, 停止の部分をつかさどるのをcollision_monitorにしたいので。)
そのため、/velocity_smootherが/cmd_velを発行せず、もう一段CollsionMonitorを絡ませるために、/cmd_velではなく、/cmd_vel_smoothedというトピックを発行することにします。その、/cmd_vel_smoothedをcollision_monitorがサブスクライブして、/cmd_velを発行するという形にします。
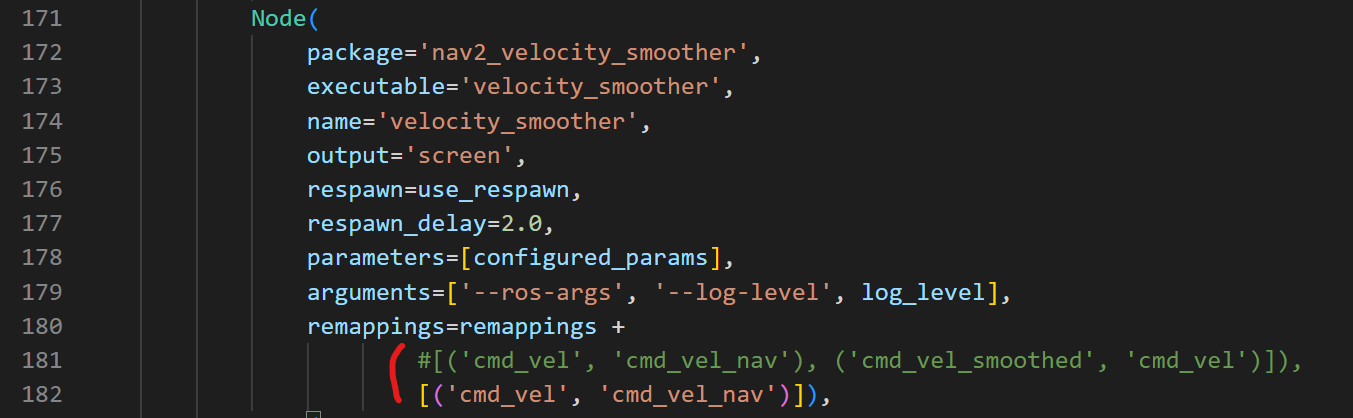
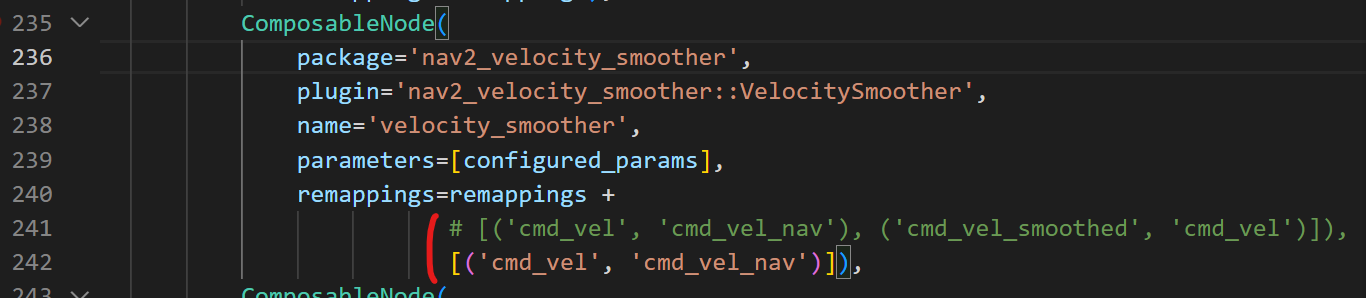
では、/opt/ros/humble/share/nav2_bringup/launch/navigation_launch.pyを変更していきます。
以下のように/velocity_smootherのremapの設定で、cmd_vel_smoothedをcmd_velにリマップする処理をなくす形とします。
次に以下のCollisionMonitorのパラメータを変更していきます。
もともとある内容から変えている部分としては、cmd_vel_in_topicをcmd_vel_smoothedで受け取るようにしています。また、PolygonStopとPolygonSlowを指定するようにしています。ポリゴンの形状も少々わかりやすいように変更しています。
/opt/ros/humble/share/nav2_collision_monitor/params/collision_monitor_params.yaml
collision_monitor:
  ros__parameters:
    use_sim_time: True
    base_frame_id: "base_footprint"
    odom_frame_id: "odom"
    cmd_vel_in_topic: "cmd_vel_smoothed"
    cmd_vel_out_topic: "cmd_vel"
    transform_tolerance: 0.5
    source_timeout: 5.0
    base_shift_correction: True
    stop_pub_timeout: 2.0
    # Polygons represent zone around the robot for "stop" and "slowdown" action types,
    # and robot footprint for "approach" action type.
    # Footprint could be "polygon" type with dynamically set footprint from footprint_topic
    # or "circle" type with static footprint set by radius. "footprint_topic" parameter
    # to be ignored in circular case.
    polygons: ["PolygonStop", "PolygonSlow"]
    PolygonStop:
      type: "polygon"
      points: [0.3, 0.25, 0.3, -0.25, 0.0, -0.25, 0.0, 0.25]
      action_type: "stop"
      max_points: 3
      visualize: True
      polygon_pub_topic: "polygon_stop"
    PolygonSlow:
      type: "polygon"
      points: [0.6, 0.2, 0.6, -0.2, 0.0, -0.2, 0.0, 0.2]
      action_type: "slowdown"
      max_points: 3
      slowdown_ratio: 0.3
      visualize: True
      polygon_pub_topic: "polygon_slowdown"
    FootprintApproach:
      type: "polygon"
      action_type: "approach"
      footprint_topic: "/local_costmap/published_footprint"
      time_before_collision: 2.0
      simulation_time_step: 0.1
      max_points: 5
      visualize: False
    observation_sources: ["scan"]
    scan:
      type: "scan"
      topic: "/scan"
    pointcloud:
      type: "pointcloud"
      topic: "/intel_realsense_r200_depth/points"
      min_height: 0.1
      max_height: 0.5
準備が整いましたので、以下のコマンドで起動していきます。
Gazeboの起動。
exportTURTLEBOT3_MODEL=burger
ros2 launch turtlebot3_gazebo turtlebot3_world.launch.py
Nav2の起動。
export TURTLEBOT3_MODEL=burger
ros2 launch turtlebot3_navigation2 navigation2.launch.py use_sim_time:=True
Collision Monitorの起動
ros2 launch nav2_collision_monitor collision_monitor_node.launch.py
以下は動作の様子です。SlowDownBoxとStopBoxのポリゴンを表示したい場合は、Addから/polygon_stopと/polygon_slowdownを追加することで表示できます。
その他
- ROS 2 Ironでは、Collision Detector Nodeが追加されました。CollisionMonitorと似ていますが、停止や減速などを行うのではなく、検出した場合の、障害物が検出された場合、トピックを通じて通知が受け取れます。これによって、障害物に近づいたときにLEDを点滅させたり、アラームを鳴らすなどが可能になります。

- 同じくROS 2 Ironでは、Collision Monitorでstate_topicを発行するようになっています。このトピックを使うことで、現在SlowDownBoxがアクティブなのか、StopBoxがアクティブなのかというのがわかるようになります。
コメント